And I wanted something self contained... nothing with individual little segments, but something that displayed well. As soon as I saw the pictures for the Lego Star Wars R2D2 set, I was completely in love.
R2D2 has always been my favourite Star Wars character... although I couldn't tell you why... maybe I always figured he would be the most useful to have around.
I bought the set on a dark and rainy June morning knowing full well that it would go away for Christmas.
And I've been resisting the urge to start putting him together since I unwrapped the box on Christmas Day. Yesterday afternoon I stopped resisting and spent the next eight hours constructing my Lego Star Wars R2D2.
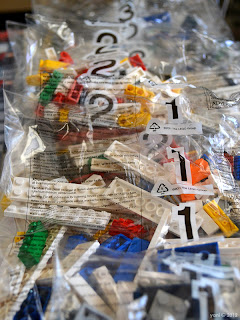
When I opened the box and unpacked everything, this is what I was confronted with...
Lots and lots and lots and lots of bags full of Lego... 2127 pieces of Lego in fact. And don't let the numbering of 1 through 10 fool you, there were often more than one bag with the same number...
There were actually fifteen bags all up, plus three instruction manuals and the "fact plaque".
For reasons I'm not completely sure on, the R2D2 minifigure that comes with the set is held captive in Bag 10, so you have to construct the whole thing before getting to put mini-R2 together.
I said to hell with that, opened Bag 10 first, rescued mini-R2 and safely stored the contents of Bag 10 in a plastic container.
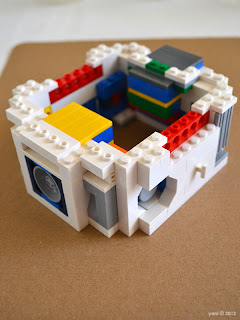
Initially I was planning on trying to photograph him at various stages as the set went together, but I realised that it would take twice as long if I did that, so I mostly settled on photographing the end of each bag...
And you can actually watch the light fade as it turns from afternoon to evening and then to night.
I was actually surprised by how much red, yellow and green Lego was used for R2's internal structure... I suppose it's easier than showing yet another white brick in the instructions.
You can also see in the background of these shots my very sophisticated and hi-tech method of construction. When I opened a new bag of Lego I sorted it into it's constituent colours... white (usually big white pieces and small white pieces depending on the bag), blue, grey and other.
It turned out to be an excellent system... and whatever time I lost in sorting the pieces as I opened each bag I suspect I probably made up in how easy it was to find the piece I needed.
And even though I ended up with a bunch of spare bricks at the end (small round dots, tiles and connector pieces mostly) I was missing one brick... a 2x1 white tile that's by mini-R2's left foot. Fortunately I had a spare tile in my existing Lego pieces but it did make me a little paranoid whenever I couldn't find the piece I needed.
The other thing that was missing, according to the instructions, was one of those orange Lego brick separators, although I've seen someone else online mention they didn't get one, so maybe it's a mistake in the instructions.
Having not built anything of this size or complexity from Lego really ever and nothing much else in the era of modern Lego (beyond the Lego Star Wars miniature vehicle range and the Lego Sydney Opera House) I was both amazed at the way that pieces where arranged and all of the advanced building techniques.
Which I guess you would expect from a set that's marked as being for 16 years and over...
Even so there were a couple of instances where I couldn't help thinking "wait... you want me to put that where?".
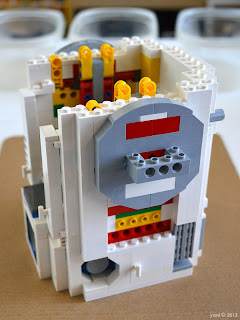
And Bag 3 added a bunch of those with R2's front panel and the two "spacecraft linkage control arms" (I totally don't remember those from the movies)... you can't see it in this photo but there's a wonderful detail of a gold rod piece behind those two upper arms... there's no purpose to it, it's just extra detail.
And I don't know that my brain was working on all cylinders throughout the entire build because even though I'd constructed the two mechanisms to make R2's tools appear out of his chest it didn't completely dawn on me until I was pretty much finished that that was what the two little rods (from the previous photos) actually did.
Dur!
Speaking of dur...it was only after I'd moved on to the next bag of pieces that I realised I never photographed the somewhat fancy internal mechanism that allows for R2's third leg to retract into his body cavity (I'm sure there's a smutty joke about cold water there somewhere).
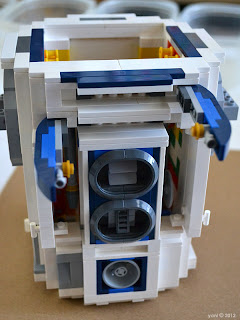
I also loved the addition of the two large vent pieces... as you can see in the previous photos, before this point it's an open space with red, green and yellow bricks showing... but Bag 4 contained the parts to create two panels that simply snap into place.
But they couldn't have been included earlier as they also hide the spot where the internal mechanism is attached to the frame.
It's little details like that that make me take my hat off to the folks at Lego.
And with the advent of Bag 5, I moved on to the second book of instructions. Although having said that, the first book is 84 pages, the second is 78 and the third is only 37.
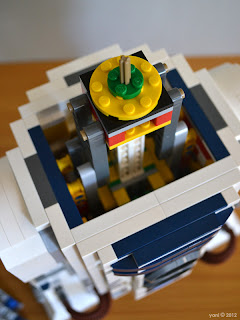
This time I remembered to photograph R2's third leg before installing it... and you can kind of see the internal mechanism in one of the shots I took this morning... the fancy top piece allows R2's head to spin around and the white piece in the middle is the third leg.
Oh and the little blue and red piece in the first photo is the anchor that stops the leg falling out of his body completely, but I couldn't put that on until the leg was in place.
After I finished the first leg I stopped for dinner... you can also tell in these photos that this was the point at which I opened the front door so the light changes yet again.
The legs have some great details within the centre panel... but my favourite is the "hydraulic arm shaft", the grey piece down the middle, which is essentially an all grey lightsaber. Technically the hilt is upside down, but still...
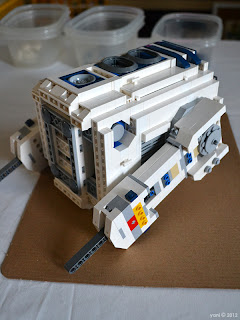
The point at which I was actually able to stand R2D2 up on his feet was actually an exciting moment... he'd been laying on his back for a really, really long time by that point, so being able to complete both feet, plus his curved shoulder tops in Bag 7 was a good feeling.
I was a little surprised that I had so many pieces left over when I'd finished both feet, but then I realised that they were the pieces to close the gap seen in the left hand photo that's needed to attach the foot to the ankle piece.
The "fuel cells" in Bag 8 came as something of a surprise to me... mostly because I had no idea that they were part of R2D2. I knew about the cables, but not what they were attached to.
They were both beautiful to built (all curved corners and crazy building techniques) and slightly painful as there were a lot of little fiddly pieces and I was getting tired by that point.
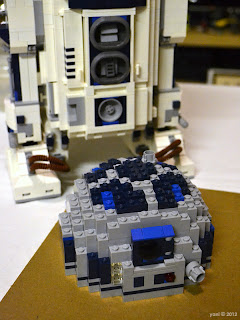
The final two bags, 9 and 10 are all about R2's cranium.
I don't know if I expected it to be easier, or it was just that it was a lot of really small fiddly pieces and lost my place in the instructions a couple of times.
I also have a feeling that if you were inventive enough you may be able to rig up lights inside R2's head that would then shine out of the clear light pieces in his head.
Again, it's amazing that with the geometry of Lego bricks they were able to create something that looks and feels just like R2's dome. Yes the red sensor light could do with being bigger, but all in all it works really well.
By the time I finished the dome and put the "fact plaque" together from the final pieces of Bag 10 I'd been working on R2 for over eight hours.
And it was really late so the lighting in my apartment wasn't as good as it could have been so I left the "beauty shots" until this morning.
What I can't get over is how much I'm totally in love with R2D2 now that he's all put together. Every time I look at the model it makes me smile (and I can't resist making his head spin around every time I get up close to him).
There was also a real sense of accomplishment on finishing him. It's one of those "I made that" feelings... I mean I know I just followed the instructions, but I made something that exists in the world.
The shot on the right shows off some of the great details on the back of R2's dome... the other holographic projector, and the great red and green transparent bricks of his rear "display".
The legs also look really great in this position, and to be honest I much prefer R2D2 in his tripod stance anyway. Plus he seems much more stable that way.
The shot on the left shows off the internal gold rod piece details... still no idea what they are, but the attention to detail is great.
A close up look at R2's "toolkit"... the universal computer interface arm and the utility saw.
They have to be extended out by hand, but the mechanism in R2's back that makes them swing out of his chest cavity works really well (once I finally worked out how it worked).
I think with a lot of opening and closing the bricks in the two little doors might start to come apart... I've already had to squash them back together again a couple of times, but that shouldn't really be a long term problem.
I can definitely see the mini-R2 figure making an appearance in my Lego photos... I've already shot a few photos with him and Little Traveller... so I think the Little boys have got themselves an Astromech droid.
The other photo is the pieces I had left over at the end of the build. It seems with everything I've made there are always those little round 1x1 stud plates left over... and basically any piece that either might be easy to lose or else weighs so little that they might not show up when the pieces are parcelled out.
Building R2D2 was thoroughly enjoyable though... even though it went a lot longer than I intended. And I think I have a little bit of cramp in my hand from all the repetitive action.
I definitely dreamt about putting together Lego pieces though... and was a little disappointed when I realised there wasn't any more to put together.
And I even went as far as to clear a space for him on my "coffee table". I don't quite know what I'm going to do with what was there previously, but he actually looks really good perched at the end of the table.
Current Mood:














No comments:
Post a Comment